top of page


Final Render Photo Composite--Booth BDNY.jpg
I rendered this image of the Lucille Booth for BDNY as the first of the booth renders for approval from Emerald Assoc that run the vetting process for the potential exhibitors at the Javits Center in NYC, NY. WOW. That process is intense, laborious, and detailed. Their manuals have manuals, and Labor Union rules above all.
1/1
- BDNY 2024 (NYC, NY) -
LUCILLE STUDIO EXHIBIT BOOTH
Developing, CO-Designing, & Launching an entire product line....
while organizing the creation of a new company........
simultaneously designing two booths............
to debut at two different exhibitions...
3000 miles from each other..
and only 4 days apart.
- in 6 months-
Let's just say I'm ready for just about anything now.
Anchor 1 Booth Front
LAYOUT - BDNY BOOTH - FRONT
-
DESIGN
-
ESTIMATION OF MATERIALS/TILES PER SECTION
-
DESIGNED PHOTOSHOP RENDER
CLICK ON THE IMAGES
to read more about the directing process.
 |  |  |  |  |
|---|---|---|---|---|
 |  |  |
Shop Photo Fabrication Location for the BDNY Lucille Booth.
This is the Shop photo that I used as the base for the Final Render for the BDNY Booth to send to Emerald for booth approval. I had to craft the empty spaces and the signs from photos of the sections still uninstalled.
I used the final render to fill in blank design sections in the other renders for WestEdge that I had to complete for booth design approval there as well.

LIGHT IT UP!
The owner had wanted Neon Signs, but due to budget I developed signage with LED strip lighting behind wood with the letters cut out. This developed into Lasered acrylic signs lit with the LED strip lighting.
Anchor 2- Side Walls
SIDE WALL LAYOUT - BDNY BOOTH
"RIGHT WALL"
 |  |  |  |
|---|---|---|---|
 | | |  |
CLICK ON THE IMAGES
to read more about the directing process.
DESIGN -
- Items: Placement, Function, Construction, Shop Labeling of Sections and Booth Support Paneling
-
COLLAPSABLE CONFIGURATION
-
ESTIMATED- Materials needed for each section based on already processed order.
-
ESTIMATED- Materials needed for each section based on an already processed order by the owner.
-
The tambor came by the stick in linear board foot as is was custom designed and custom routed.
-
Much math...much, much math was needed to figure this wall's layout
-
The nine designs were ordered before this wall was designed.
-
Different amounts were ordered for different designs and the dimensions of each tambour repeat are unique to that design.
-
-
SHOP MANAGEMENT DIRECTION of Tambour Section assembly & Booth Labeling
Anchor 3-Floor
FLOOR LAYOUT - BDNY BOOTH
CLICK ON THE IMAGES
to read more about the directing process.
 |  | |
|---|


All Videos
Anchor 4-Engineering Explaination
BOOTH & CRATE ENGINEERING
CONSTRUCTION PROCESS
BOOTH
DESIGN / Engineering
-
COLLASPABLE CONFIGURATION
- BACK WALL
- 4 Panel Back Wall System assembled with toggle table connectors
- Removable Design Panels
-
ANGLE BANGLE & WAVE Design Sections velcroed to remove for shipping
-
-
SIDE WALLS
-
3 Panel Back Wall System
-
"Line of Sight Half Walls" assembled with toggle table connectors
-
-
Corner Stability Ceiling Topper
-
I designed the slide on channeling system to fit the Back Wall and Side wall tops for installation ease.
-
-
- BACK WALL
-
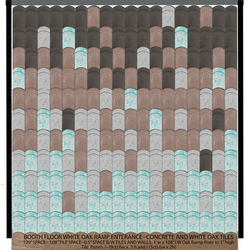
OMBRE CONCRETE AND WOOD FLOORING
-
Designed and directed the sublayer for ADA Certification
-
interconnecting plywood floor paneling 30" x 36"
-
nonskid foam
-
-
CRATES
SHIPPING AND STORAGE
DESIGN / Engineering
-
SHOP MANAGEMENT LABELING AND INSTALL DIRECTION
-
LABELING-- I developed acronym codes for the Wall Support Panels, the removable design panel inserts, and for placement in the shipping crate.
-
Color Coded
-
Location Specific
-
-
Directed-- A Storage System and Instruction Handout for unloading the paneling of the booth from the crate in the order that it would need to be set up and also the reverse for break down and storage.
-
God Bless you Wes and Cathy!
-
-
-
CRATE DESIGN "EVERYTHING HAS IT'S PLACE" CONFIGURATION
-
Collaborated the crate construction to fit 108" panels inside a 92" x 93" x 102" shipping crate maximum. Diagonal from corner to corner on the side axis. Everything else fit around, and had two levels.
-
bottom of page